Tech Tip: Field Update for ArcGIS
November Tech Tip
by Alissa Oder
Click here to check out our new Training videos
Today’s tech tip is for DAT/EM Capture for ArcGIS® users. Are you setting the same field values again and again? You can set Keypad, digitizer or Summit’s Custom CAD toolbar buttons to set one or more commonly applied field values. Then it will be a simple two-step process to apply the field values: Select the object and press the button or key.
First, I suggest you set a keypad key, test it to make sure it’s working, then copy the string to the Button Manager or Custom CAD toolbar button if you’d like. If you don’t use the keypad and answered “No Keypad” when you installed your DAT/EM software, you can still use it on screen. If the blue grid keypad icon is shown on your taskbar ![]() , double click it.
, double click it.
If it isn’t there, use Start > All Programs > Datem Software > Datem Keypad. If you don’t have your own custom keypad diagram already, open DAT/EM’s ESRI.dkf and save it as a custom file name. It’s located in “C:ProgramDataDatem Systemskeypad” (you may need to show hidden files in Explorer to see this folder).

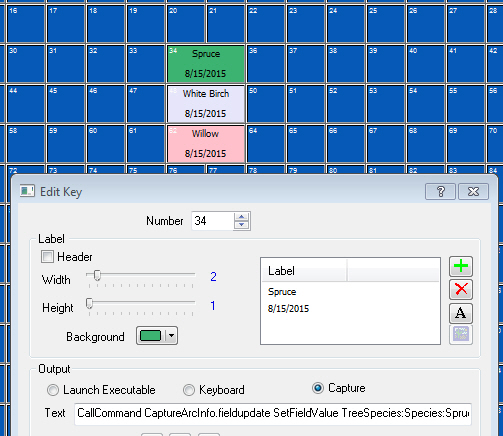
Set a FieldUpdate button in the Keypad
You can also set the button directly in the Button Manager or Custom CAD toolbar editor. These are located in Summit > Tools > Button Manager or Summit Custom CAD toolbars. The Custom CAD toolbar editor is only located on the first Custom CAD toolbar, but you can use it to set the buttons on all three toolbars. If the toolbars aren’t on, check them on from Summit > Tools > Customize Toolbars.
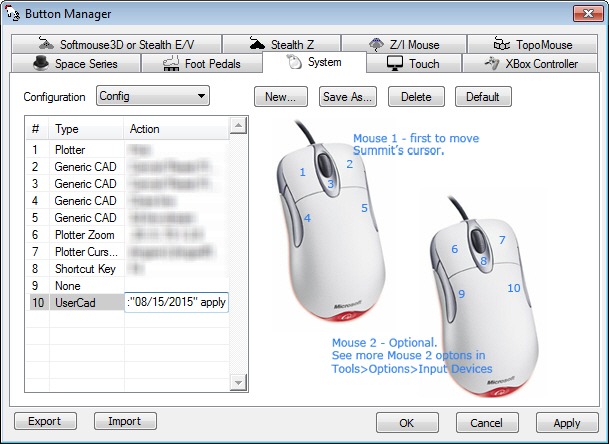
Paste or set a FieldUpdate string in a “UserCAD” button in Summit’s Button Manager
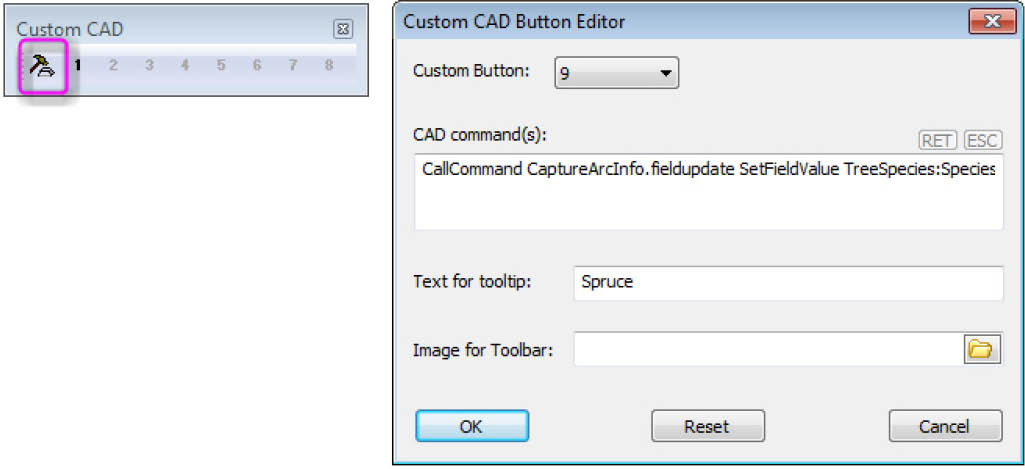
Paste or set a FieldUpdate string in Summit’s Custom CAD toolbar editor
The syntax to set and apply field values is shown here with color coding to help you see the separation between the different parts of the string. Note that this string wrapped in this display, but it should be one continuous text string and must not contain return characters:
CallCommand CaptureArcInfo.fieldupdate SetFieldValue <Layer name case sensitive>:<Field name case sensitive>:<field value> <repeat SetFieldValue any number of times if there are other fields to be set> apply
The layer name and field name values are case sensitive. That is, if the layer is called ThisIsMyLayer and the field is called MyFIELD , the characters must be entered as SetFieldValue ThisIsMyLayer:MyFIELD:525. By comparison, setfieldvalue thisismylayer:myfield:525 will not work.
Fields and values that contain spaces must be grouped with quotes, for example:
SetFieldValue Obstacle:"Description field with spaces":"Multiplex residential"
It supports using the field alias instead of the field name. For example:
SetFieldValue Obstacle:"Alias of Description Field":"Single family home"
where “Alias of Description Field” is the field alias.
There are two steps to apply the button/key to an object to set its fields:
- Use an ArcMap selection tool or the ArcMap edit tool to select (highlight) the object in the ArcMap data view.
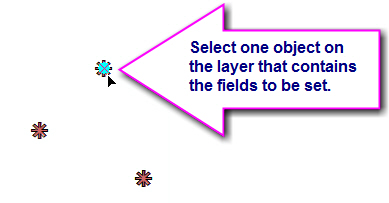
- Press the key or button.

You may review and troubleshoot your button/key settings using the DAT/EM Field Update tool. If you have multiple fields set on the button/key, they should all be applied at one time when the syntax is correct. The Field Update dialog may remain on screen while you use your button/ key. The button/key should have the same effect as setting values in “New Field Value” and selecting the “Apply” button in DAT/EM Field Update:
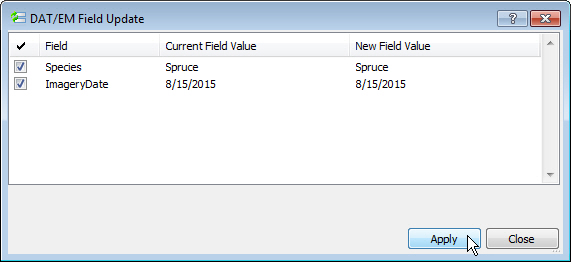
The button/key will automatically apply the values as if applied from Field Update dialog
Example:
Let’s say you have a layer called TreeSpecies that has fields called Species (text type) and ImageryDate (date type). You are identifying individual trees in a stand of spruce, white birch, and willow trees. ImageryDate is to be set to the date of the imagery acquisition, in this case 15 August 2015. The date will need to be applied in the format “08/15/2015” inside quotes. Set three buttons or keys:
CallCommand CaptureArcInfo.fieldupdate SetFieldValue TreeSpecies:Species:Spruce SetFieldValue TreeSpecies:ImageryDate:"08/15/2015" apply
CallCommand CaptureArcInfo.fieldupdate SetFieldValue TreeSpecies:Species:Willow SetFieldValue TreeSpecies:ImageryDate:"08/15/2015" apply
CallCommand CaptureArcInfo.fieldupdate SetFieldValue TreeSpecies:Species:”White Birch” SetFieldValue TreeSpecies:ImageryDate:"08/15/2015" apply
Here we view the object in Field Update before the field-setting button/key is used:
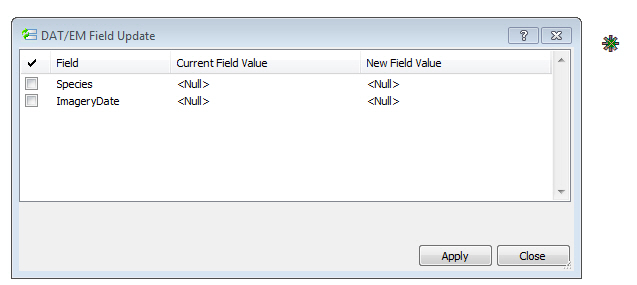
Before using the White Birch button/key
Select the object and press the button for White Birch. The fields are automatically applied and can be viewed immediately in the Field Update dialog:
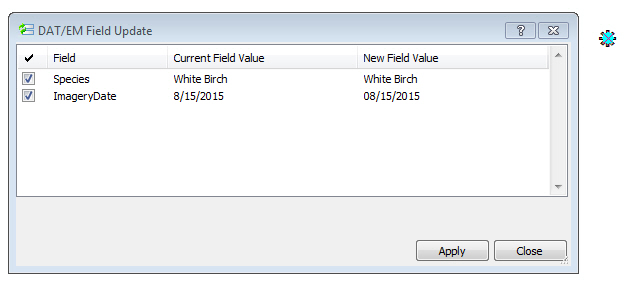
After using the White Birch button/key
-End-
Comments are closed.