Tech Tip: Display RGB and the 4th Band in Summit
Do you have an idea for a tech tip?
Submit it to support@datem.com to the attention of Alissa Oder.
July 2014
Display RGB and the 4th band in Summit at the same time. Do you have 4-band imagery? To see the 4th band at the same time you view the RGB part of the images, use the Channel Manager and multiple viewports.
Start the Channel Manager (Summit>Imagery>Channel Manager). Make a channel map that sets the 4th band to all three display channels. Here, we set channel map number 7 to 3,3,3 (the count starts at 0, so 3 is really the 4th band).
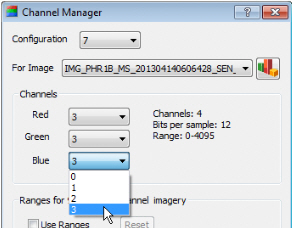
Create a 4th band channel map: Red=3, Green=3, Blue=3
Now open two viewports (Summit>View>Viewports>Two:Vertical or Horizontal) and check on “All viewports follow…” and the “Match…” settings.
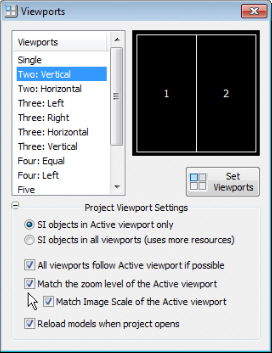
Set two viewports
Drag the same model from the Project window into both viewports.
Use the channel map setting at the top right of the viewport to set channel map number 7:
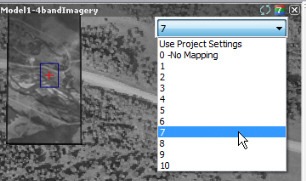
Set the viewport to the 4th-band-only channel map
Now the model is displayed as the RGB default in one viewport and the 4th band is displayed in the other viewport. Since the same 4th band is sent to all three display channels, giving matching color values such as (56, 56, 56) or (230,230,230), it will appear correctly as a grayscale image.
Remember you can size the viewports by dragging the double arrow cursor at the border between the viewports.
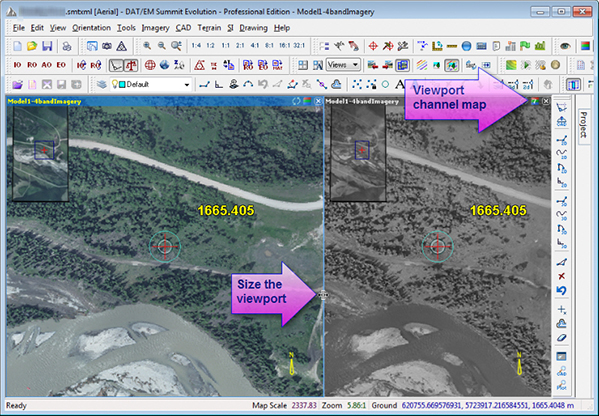
Set the viewport’s channel map and size the viewport
Comments are closed.